
Introduction
MX GRID by MXbeats is a versatile music production tool designed for both live performers and studio musicians. Available as a standalone application and DAW plugin (VST/AU), it provides 32 outputs for flexible routing and 512 slots for loops, one-shots, and audio clips.
MX GRID supports two playback modes: Session for real-time triggering of clips using a mouse or MIDI controller (e.g., Launchpad), and Arranger for composing complete songs on a timeline. Seamless integration with grid controllers and effortless media management provide a distinctive experience for music creators.
Simply drag audio files (WAV, AIFF, MP3, OGG) or entire folders onto the grid — the application automatically detects whether each file is a sample or loop and assigns parameters like tempo, color, icon, and instrument group. You can drag files from any file explorer on your computer, or use the built-in Media Explorer to browse and import directly from your library.
Main Panel
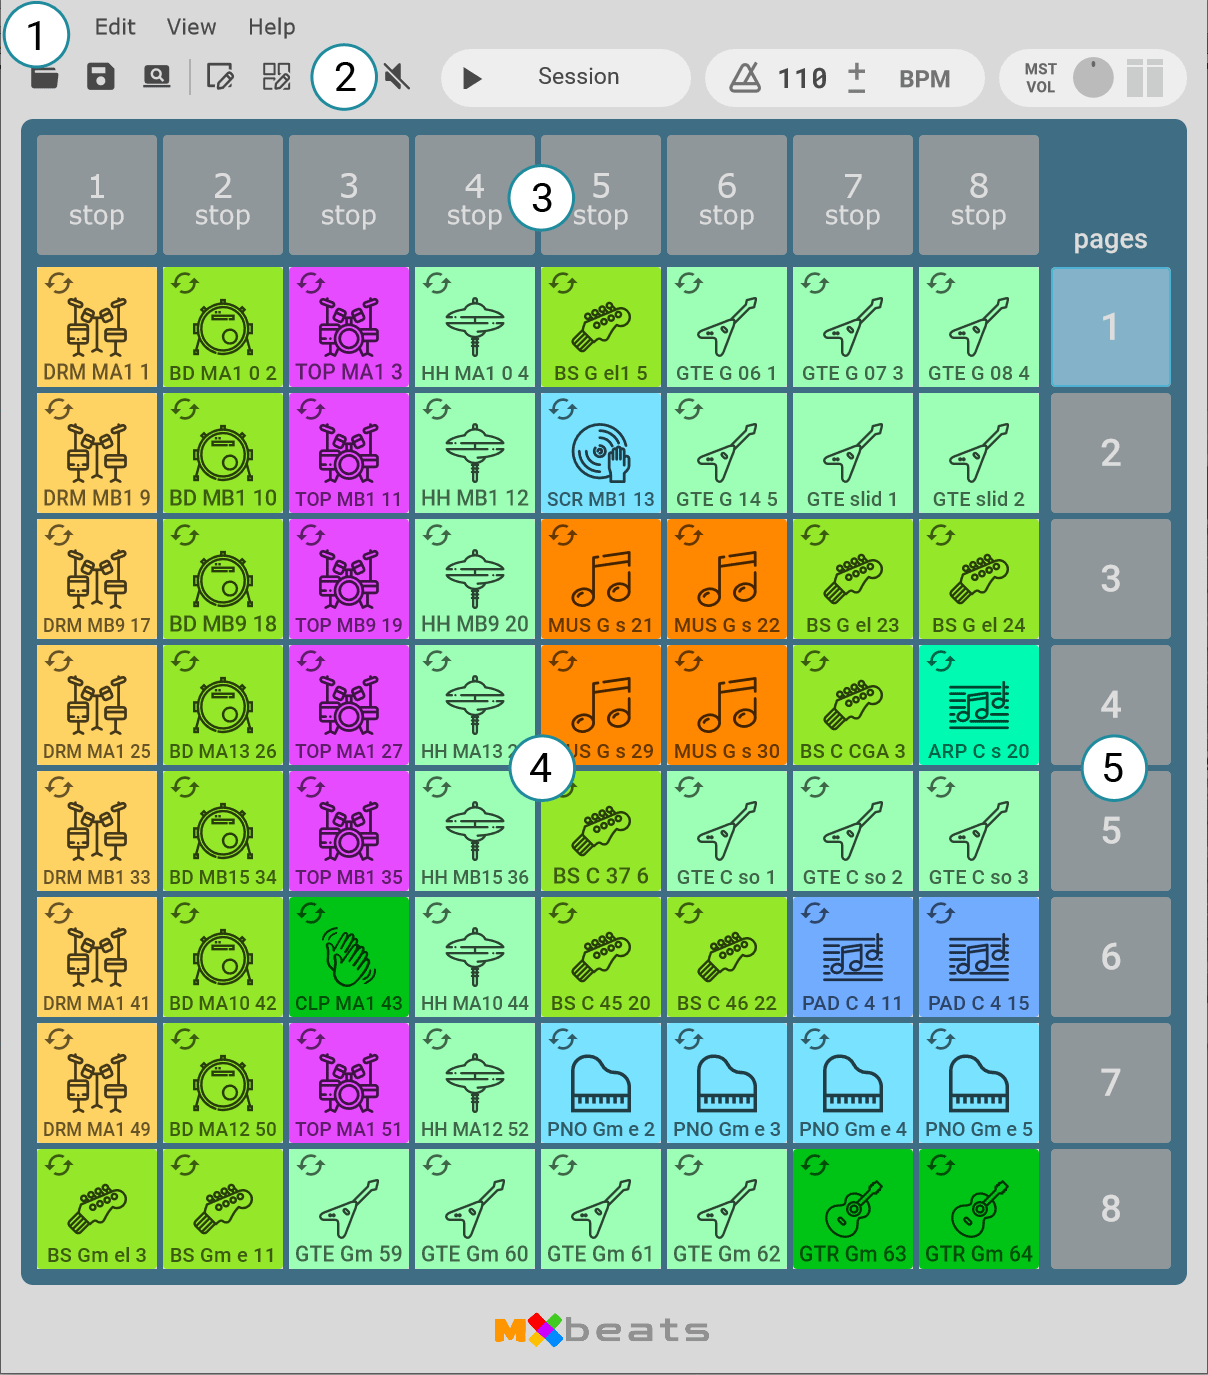
Main Menu
File
- New Project — reset to default state.
- Reload Project — revert to the last saved state.
- Open Project — load a project file.
- Save / Save As — save the current project.
- Render Audio — generate a stereo audio file from the Timeline arrangement. (Pro)
- Exit — close the application.
Edit
- Audio Settings — configure audio device type (ASIO, Windows Audio, etc.), sound card, output channels, sample rate, and MIDI input/output devices.
- Project Settings — project-specific settings dialog.
- Turn off All Sounds — immediately silences all playing clips.
- Refresh MIDI Grid Device — refreshes the state and colors on the connected MIDI controller.
View
- Media Explorer — browse and import audio files from your file system.
- Box Editor — open the editor panel.
- Page Editor — rearrange boxes and batch operations.
- Timeline Editor — open the Arranger to compose songs.
- Zoom In / Zoom Out — adjust the application size for different screen resolutions.
- Light Mode / Dark Mode — switch the color theme.
Help
- Project Notes — add and edit comments for the current project.
- Online Help — open the online manual on the product website.
- User Panel — open the user panel on the website.
- Register Product — registration and license management.
- About — display the installed version and current license information.
Toolbar
 Open Project — Open a project file
 Save Project — Save the current project file
 Box Editor — Edit individual clip parameters
 Page Editor — Rearrange clips and batch operations
 Show Arranger — Switch to arrangement mode
 Media Explorer — Browse and import audio files from your file system
Transport Control
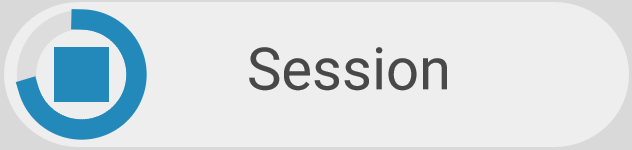
Starts or stops playback in Session or Arranger mode. During playback, an arc-shaped progress bar around the Stop button shows the current position within the bar. A label next to the button displays the current mode: “Session” or “Arrangement”.
Tempo Widget
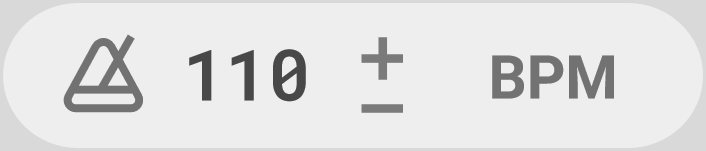
Sets the current project tempo (BPM). Tap the metronome icon repeatedly to set tempo, or click the tempo value to type it manually. Use the +/− buttons to adjust by 1 BPM.
If any loop has a different tempo than the project, an Apply button appears — click it to convert all mismatched loops to the project tempo.
Master Volume Widget
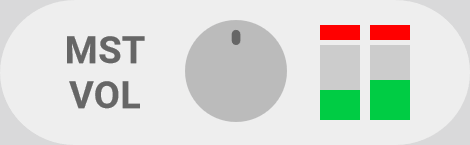
Controls the overall playback volume of the project. Per-channel level meters and clipping indicators are shown to the right of the knob. Clipping indicators light up red if the audio clips at any point; click them to reset.
Media Grid
The Media Grid is the central area of the application — a virtual controller consisting of 64 square buttons (8×8) spread across 8 pages, providing a total of 512 slots for loops or samples.
Samples
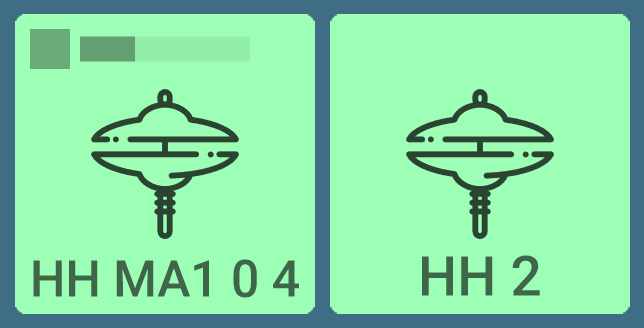
Samples (one-shots) can be triggered at any point. They support variable velocity and can be routed to 32 outputs for VST effects processing. A gray progress bar at the top of the box shows playback progress.
Loops
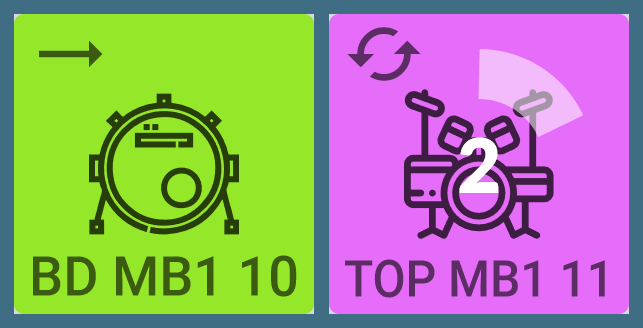
Loops are synchronized with the song. When triggered, a loop waits for the next bar boundary before starting playback.
- A flashing box indicates the loop is waiting for the next bar.
- A pulsing box with a progress arc means the loop is playing.
- Each loop belongs to one of 8 instrument groups. Only one loop per group can play at a time.
- The play mode icon (top-left) shows whether the loop repeats or plays once.
Stopping Individual Clips
During playback of any clip (loop or sample), hovering over the box reveals a Stop button in the top-left corner. Clicking it immediately stops playback of that individual clip — no need to use the Stop Group buttons or the All Sounds Off (panic) button.
Loading Clips
Drag and drop audio files (WAV, AIF, AIFF, MP3, OGG) or entire folders from your file explorer onto the grid. The application automatically detects clip type and assigns tempo, color, icon, instrument group, and name. You can also load clips via the Box Editor.
Stop Group Buttons
The top row above the grid contains 8 Stop Group buttons — one for each instrument group. MX GRID organizes sounds into instrument groups (e.g., percussion, bass-line).
- Only one loop from a given group can play at a time.
- When a group is playing, its Stop button lights up red.
- Clicking a Stop button makes it flash (waiting for the bar end), then stops the group.
Page Buttons
The column of 8 page buttons on the right side of the grid lets you switch between pages. Each page provides 64 slots, giving a total of 512 slots across all 8 pages. The active page button is light blue; inactive pages are gray.
Box Editor
The Box Editor opens a right-side panel for editing individual clip parameters. Activate it from the toolbar or the menu (View → Box Editor), then click any box on the grid to edit it. Clicking an empty slot lets you create a new sample or loop.
Edit Samples
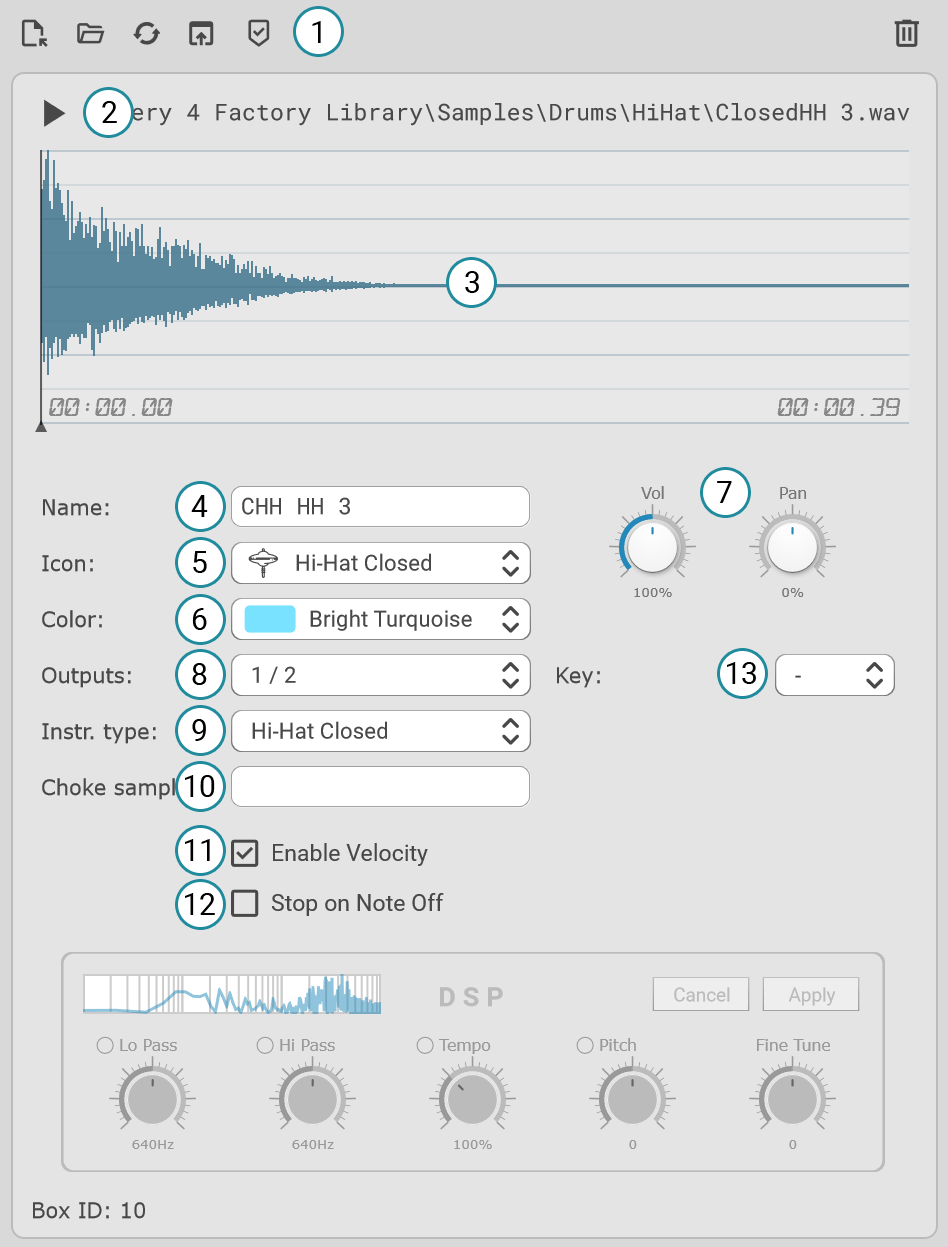
- Toolbar:
 Load file(s) — load one or more audio files. Additional files fill consecutive empty slots.
 Load folder — load all audio files from a folder.
 Convert to Loop — converts the sample into a loop.
 Open in external app — edit the file in your system’s default audio editor (e.g., Audacity). (Pro)
 Save Meta — saves the metadata (name, icon, color...)
 Clear Box — remove the clip and reset the slot.
- Playback: Play/Stop button and the file path of the loaded audio file.
- Waveform: Visual waveform thumbnail. Click anywhere to start playback from that position. Shows current time and total duration.
- Name: Text field for the clip name (max 12 characters). The name appears on the grid box.
- Icon: Choose from 200+ music-related icons. Select the empty icon to display the name in the center instead.
- Color: Choose one of 16 colors. Colors are mirrored on your MIDI controller.
- Volume & Pan: Vol: 0%–200%. Pan: −100% (left) to +100% (right).
- Outputs: Route audio to specific stereo pairs (up to 32 channels). Available in DAW plugin mode for adding external effects.
- Instrument Type: Choose the instrument category (e.g., Snare, Guitar, Bass). Helps identify and filter clips in the Media Explorer.
- Choke Samples: Comma-separated Box IDs that will be silenced when this sample triggers (e.g., closed hi-hat stopping an open hi-hat).
- Enable Velocity: When enabled, volume varies based on MIDI strike force. Requires a velocity-sensitive controller.
- Stop on Note Off: When enabled, the sample stops immediately on mouse/pad release. When disabled (default), the sample plays to completion.
- Key: Choose the musical key or scale of the clip (e.g., C#, Dm). Useful for organizing clips by pitch.
Edit Loops
The Loop Editor shares most features with the Sample Editor. Only the differences are covered below.
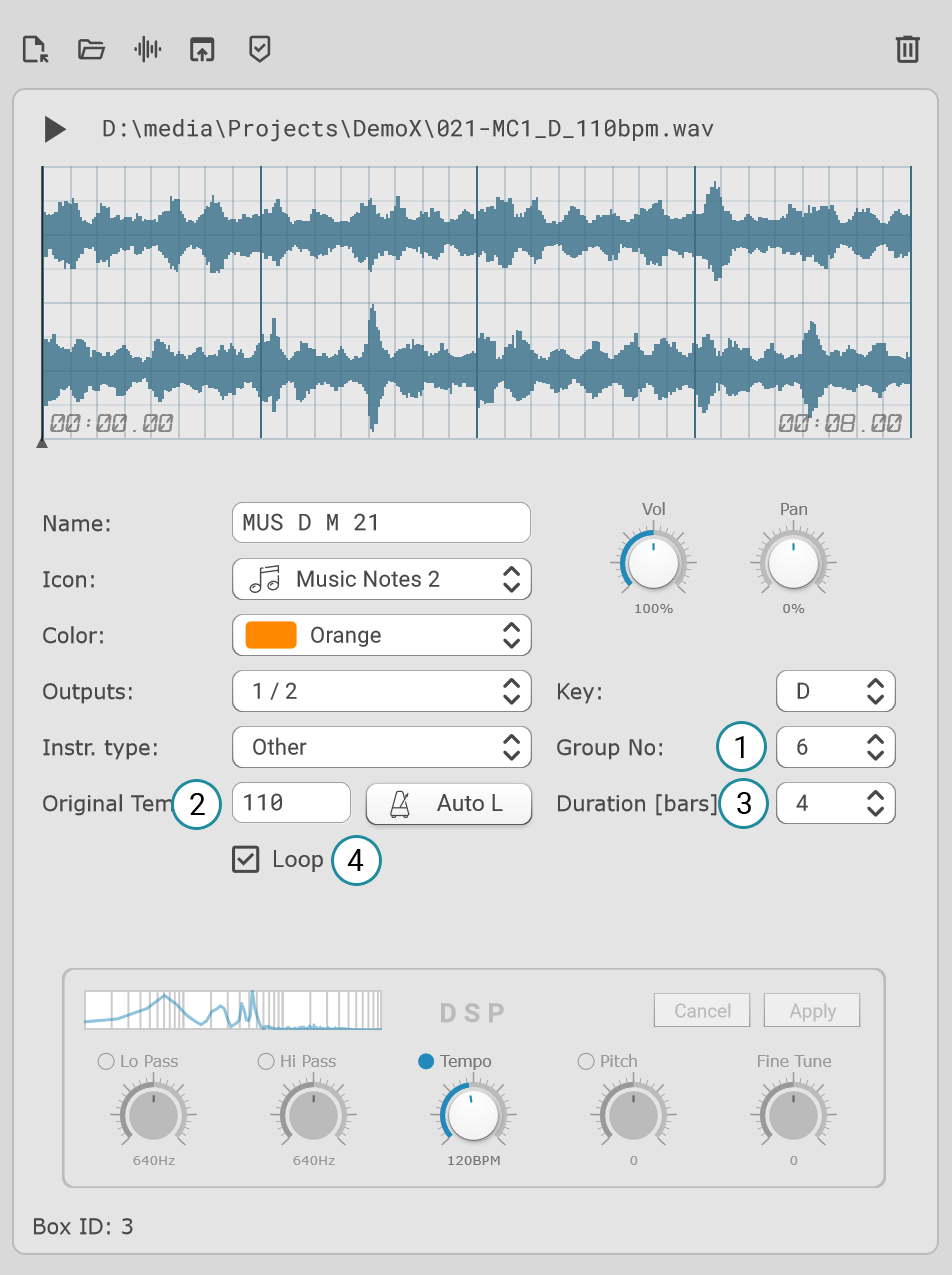
- Group Number: Assign the loop to one of 8 instrument groups. When another loop from the same group starts, the previous one stops automatically.
- Original Tempo: The original BPM of the audio clip. Click the Auto button (metronome icon) to detect it automatically. Multiple clicks may yield different results as various detection algorithms are used.
- Duration: The loop length in musical bars.
- Loop Checkbox: Enabled: the loop repeats after finishing. Disabled: playback stops after one cycle.
Note: “Convert to Loop” is replaced by Convert to Sample in the toolbar. A Save metadata to audio file saves the clip’s name, icon, color, BPM, group number, key, and instrument directly into the audio file so these settings are applied automatically on any future import.
DSP Effects (Pro)
Both sample and loop editors include a DSP Effects section at the bottom with five knobs:
- Lo Pass — low-pass filter
- Hi Pass — high-pass filter
- Tempo — playback speed (50%–200%), without changing pitch
- Pitch — pitch shift (−12 to +12 semitones), without changing tempo
- Fine Tune — fine pitch adjustment (works with the Pitch knob)
Each of the first four knobs has an enable/disable toggle. Fine Tune activates automatically with Pitch. A small frequency spectrum display shows the filtered result. Combining Lo Pass and Hi Pass creates band-pass or band-reject filtering.
Click Apply to cache the processed audio for better performance, or Cancel to discard changes.
Page Editor
The Page Editor lets you organize your grid and perform batch operations on multiple boxes.
Use left-click to select and drag individual boxes. Use right-click to select multiple boxes, then drag them together. Use Shift+Click to select all boxes between the first and second clicked box.
Edit
Edit — modify parameters of selected boxes: icon, color, output, volume, pan, group number, duration, original tempo, loop mode, choke samples, enable velocity, stop on note off. Available options depend on the clip type.
Copy / Paste / Cut / Delete — standard clipboard operations.
Convert
Sample — convert selected loops to samples.
Loop — convert selected samples to loops.
Tempo — convert selected loops to the project tempo. (Pro)
Actions
Deselect — deselect all boxes.
Undo / Redo
File
Save Meta — saves the metadata (name, icon, color, BPM, group number, key, instrument) of all selected clips directly into their audio files.
Arranger (Timeline Editor)
The Arranger lets you compose a song by dragging and dropping clips onto a timeline grid.
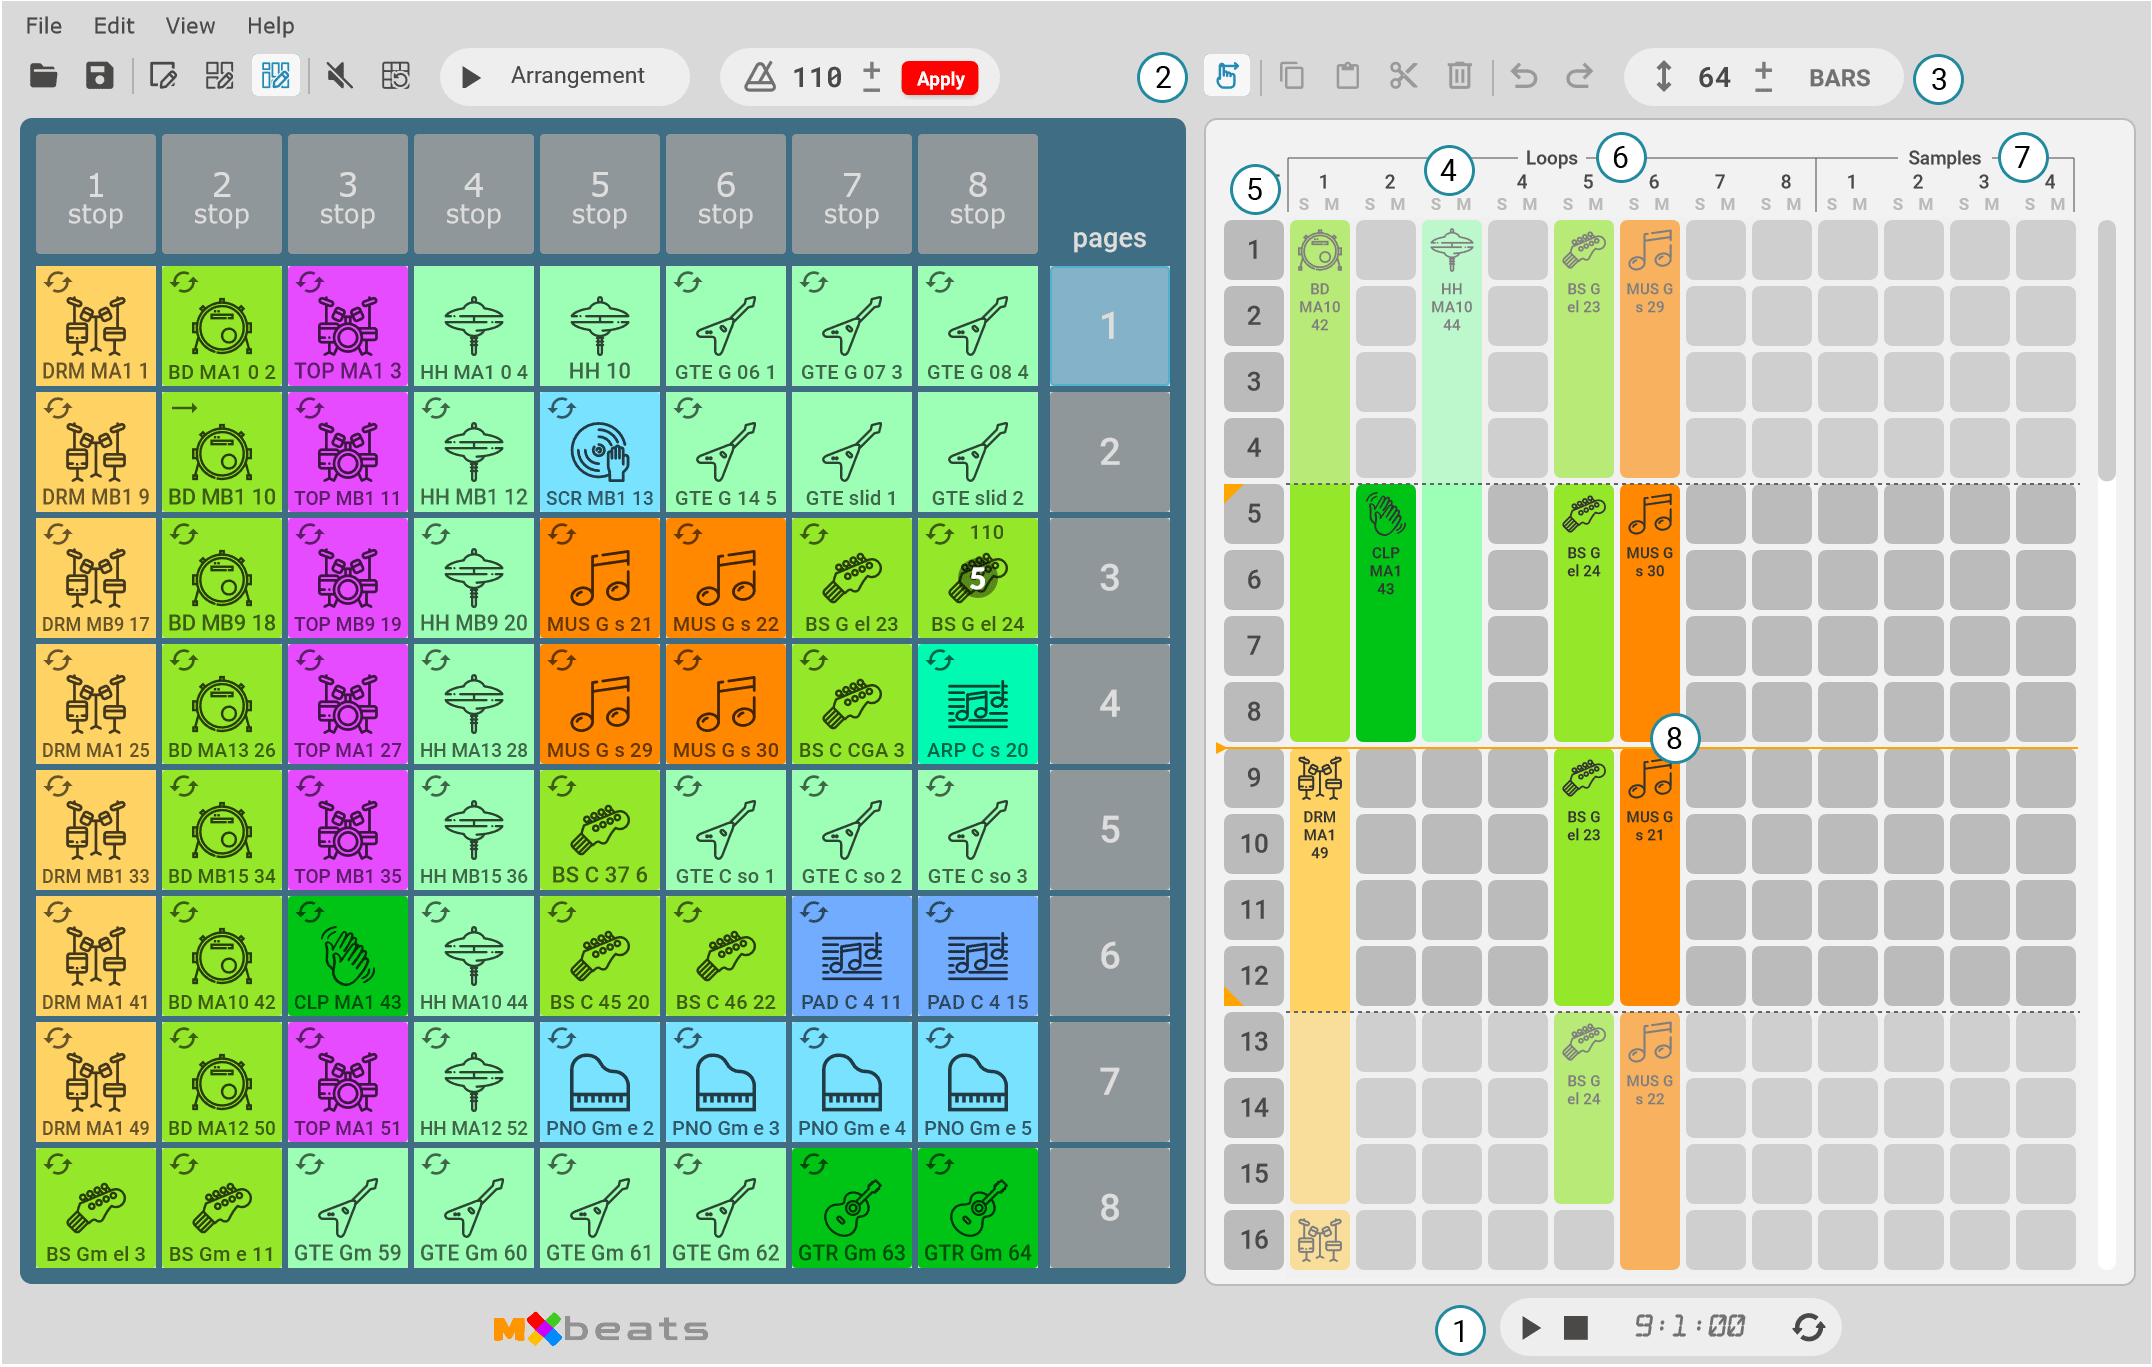
1) Transport Controls

Play / Pause / Stop — Play starts the arrangement; during playback the button changes to Pause. A separate Stop button stops playback and resets the playhead.
Next to the transport buttons, a position display shows the current playback position in musical bars.
The Toggle Looping button enables continuous playback — when active, the song automatically restarts from the beginning after reaching the end.
2) Edit Buttons
 Drag and Drop — enabled by default. Drag clips from the Media Grid onto the timeline. Dragging a clip back to the grid removes it from the timeline. The target track is highlighted while dragging.
Additional buttons: Copy, Paste, Cut, Delete, Undo, and Redo.
Use Shift+Click to select all cells between two clicked positions, or Ctrl+Click to add individual cells to the current selection.
3) Song Length
Sets the total song length in musical bars (minimum 16). Use the text field or +/− buttons. If reducing the length would cut existing content, an Apply button appears with a confirmation dialog.
4) Solo / Mute
Each track has S (solo) and M (mute) buttons below the track number for selective listening.
5) TIME Column
- Click center — place the playhead at that bar.
- Click left edge (top) — set a temporary song start point.
- Click left edge (bottom) — set a temporary song end point.
- Inactive parts of the song are grayed out.
6) Loop Tracks
- 8 tracks reserved for loops (one per instrument group).
- Adjust loop start and length by dragging the top or bottom edge of the loop cell.
7) Sample Tracks
- 4 tracks reserved for samples.
- Samples can be freely moved within the sample tracks.
- Right-click a sample for additional options:
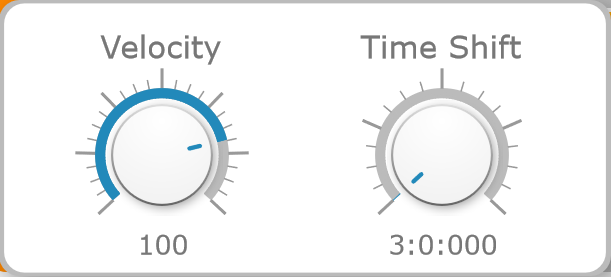 Velocity — set the sample’s playback volume. Time Shift — set the exact trigger time within the bar.
8) Timeline Grid
- Consists of 13 columns: 1 TIME column + 8 loop tracks + 4 sample tracks.
- Each cell represents one bar.
- Drag clips from the grid onto the timeline to build your arrangement.
Media Explorer
The Media Explorer is a built-in tool designed for cataloguing, quickly finding, and previewing audio files on your computer. Open it from the toolbar or via View → Media Explorer.
Toolbar
 Add Media Folder — add a folder to your media library.
 Remove Selected Folder — remove the selected folder from the library.
 Stop Parsing — stop the background scan at any time.
 Auto Preview on Hover — hover over a one-shot to hear a quick preview. (Not available for loops to keep CPU usage low.)
Folders
Shows your media folders as a collapsible tree. When you add a folder, MX GRID scans it automatically — detecting each file’s type, BPM, key, instrument, and generating a waveform thumbnail for fast browsing.
Select All Folders at the top to browse your entire library at once. The file count for each folder is shown in parentheses.
Drag an entire folder onto the grid to import all its files. Reopening the Explorer triggers a quick rescan to pick up any new or changed files.
Files
Lists all audio files in the selected folder. Use the Search field to filter by name or instrument. Click the filter button to narrow results by BPM range, key, or clip type.
Click Play to preview a file. When your project is playing, previewing a loop syncs it to the current tempo and the next bar — the button flashes while it waits to start.
Drag files onto the grid, or use Ctrl+Click / Shift+Click to select multiple files first. Press Shift+A to select all files in the current folder.
Click the info button on any file to see its full path, size, type, BPM, key, and duration.
Transport Bar
While a file is previewing, a transport bar appears at the bottom of the panel. It shows the waveform, filename, and a Volume knob. Click the waveform to jump to any position. The bar stays visible while you scroll.
Project Settings
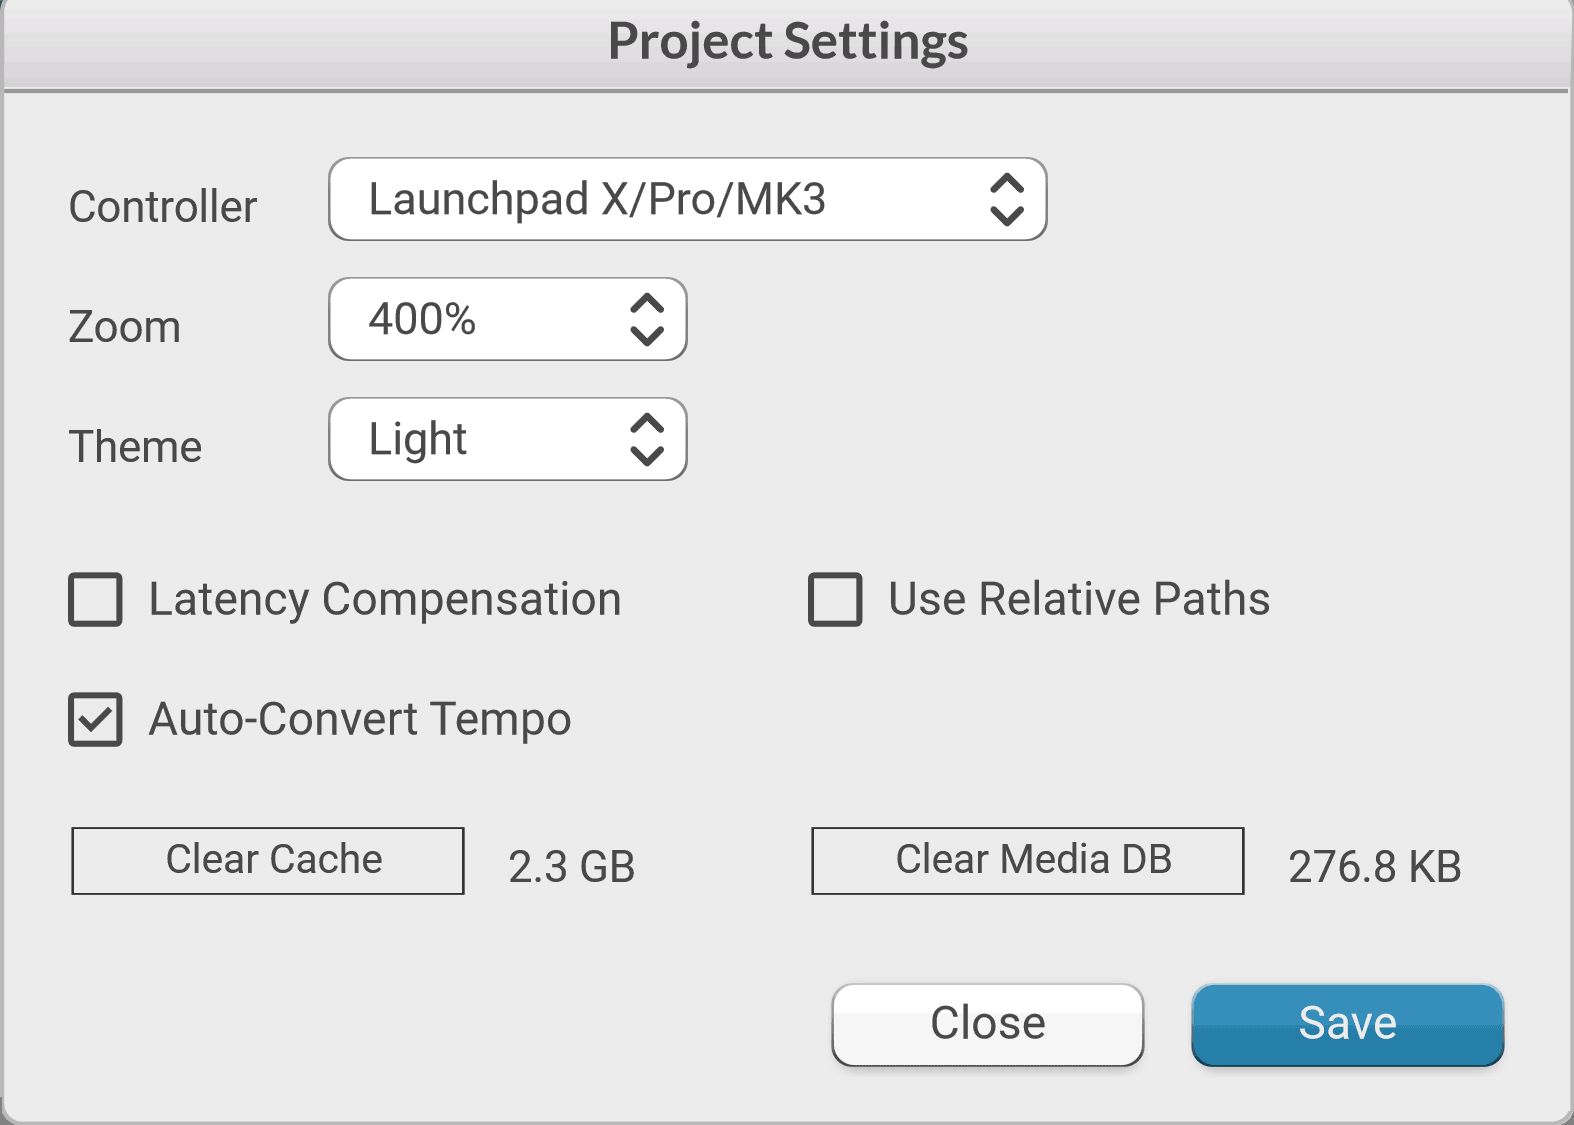
- Controller — select a MIDI controller (None, Launchpad X).
- Zoom — adjust the application zoom level for different screen sizes.
- Theme — switch between Light and Dark mode.
- Latency Compensation — used in VST mode to compensate for sound card latency and ensure accurate timing.
- Use Relative Paths — stores file paths relative to the project location. Makes it easy to move or share projects between computers.
- Auto-Convert Tempo — when enabled, all imported loops are automatically converted to the current project tempo.
- Clear Cache — clears cached DSP-processed audio files. The current cache size is shown next to the button.
- Clear Media DB — clears all data stored in the Media Explorer database. The current database size is displayed next to the button.
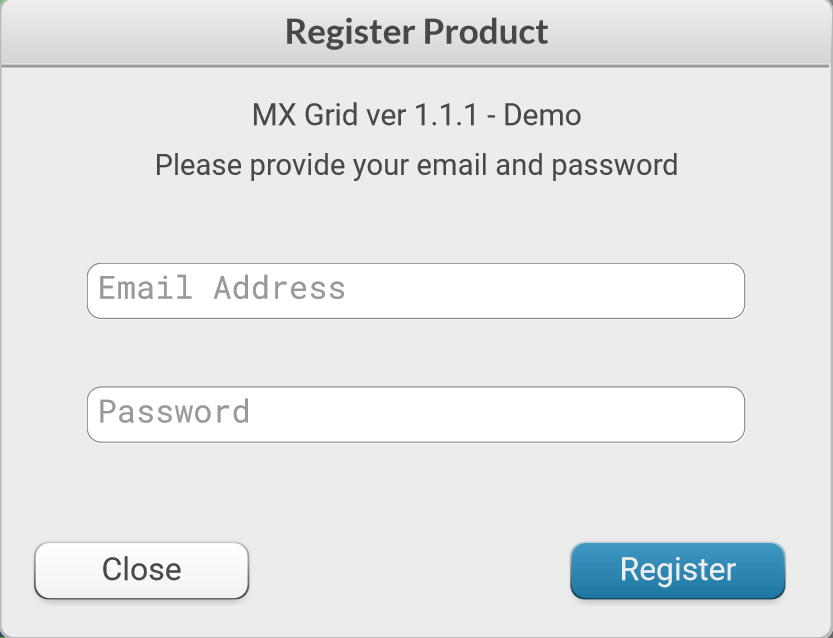
Product Registration
-
Register the Product
- Go to Help → Register Product and enter the email and password used when registering on the product website.
- The software connects to the server and retrieves your license.
- You can register on up to 2 computers simultaneously.
-
Refresh License
- After upgrading your license tier (e.g., from Essentials to Loops Pro), click Refresh License to update.
- The software periodically checks the license status automatically.
-
Deactivate License
- Click Deactivate License to unregister this machine and free up an activation slot.
- Use this when transferring the license to another computer.